How to Use a Pressure Cooker for Growing Mushrooms
How to Use a Pressure Cooker for Growing Mushrooms (Lion's Mane, Oysters, etc.)
Introduction to Mushroom Cultivation at Home
Growing mushrooms at home is one of the most rewarding hobbies for both beginners and seasoned gardeners. Whether you're fascinated by the brain-boosting power of Lion's Mane or love the meaty texture of oyster mushrooms, cultivating your own supply can save money, provide fresher produce, and give you full control over the growing process. Unlike traditional plants, mushrooms thrive in darkness and humidity---making them perfect for indoor cultivation.
But here's the catch: mushrooms are extremely sensitive to contamination. Their spores compete with bacteria and mold for nutrients, and without a sterile environment, your grow can fail before it even starts. That's where the pressure cooker becomes your secret weapon. It's not just a kitchen gadget for stews; it's the cornerstone of a clean, contamination-free mushroom setup.
Why Grow Mushrooms Yourself
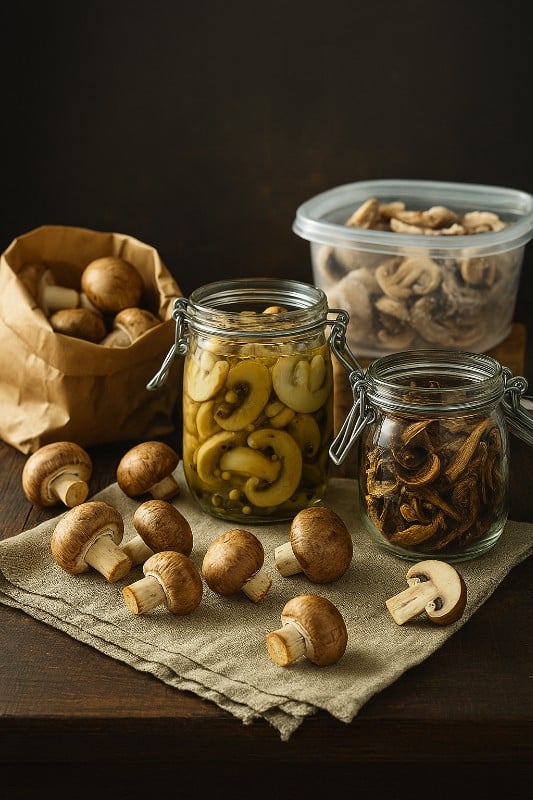
Growing mushrooms at home lets you enjoy fresh, organic fungi without additives or pesticides. Store-bought mushrooms often lose freshness within days, while homegrown ones are harvested and eaten at their peak. Plus, cultivating species like Lion's Mane offers cognitive benefits---many people grow it for natural brain and nerve health support. Oyster mushrooms, on the other hand, are known for their rich umami flavor and fast growth rate, making them ideal for beginners.
The process teaches patience and precision, too. You'll learn how to monitor humidity, light, and airflow---skills that improve your overall understanding of microbiology and food cultivation. Once you nail your first batch, it's surprisingly easy to scale up or experiment with exotic strains.
The Importance of Sterilization in Mushroom Growing
Think of sterilization as your first line of defense. Every grain, sawdust particle, or coffee ground in your substrate can harbor microscopic competitors like mold spores and bacteria. These invaders can quickly overrun your mushroom mycelium, leaving you with a jar full of green or black fuzz instead of snow-white threads.
A pressure cooker uses high heat and pressure (usually around 15 PSI) to destroy these contaminants completely. Regular boiling or steaming can't reach the temperatures needed to kill all microbial spores, but a pressure cooker does---reliably. Without sterilization, even the cleanest-looking substrate can cause failed colonization or weak yields. That's why every serious grower considers a pressure cooker non-negotiable equipment.
Understanding the Role of a Pressure Cooker in Mushroom Cultivation
What Does a Pressure Cooker Do in Mushroom Growing?
At its core, the pressure cooker is a compact sterilization chamber. By trapping steam under pressure, it raises the boiling point of water, allowing temperatures to reach around 121°C (250°F)---hot enough to annihilate bacteria, mold spores, and other pathogens. For mushroom growers, this means the substrate becomes a blank canvas, ready for your chosen mushroom spores or spawn to colonize without competition.
When you sterilize grain jars or sawdust blocks in a pressure cooker, you're ensuring that the only living organism introduced afterward is your mushroom mycelium. It's the same principle used in laboratories, but done affordably in your kitchen.
How Pressure Cooking Prevents Contamination
Let's imagine two jars: one sterilized with a pressure cooker and one that was simply boiled. After inoculation, the pressure-cooked jar will allow mycelium to grow evenly and vigorously. The boiled jar, however, might show green mold spots within days. That's contamination---caused by surviving spores or bacteria.
Pressure cooking prevents this by penetrating deep into the substrate with superheated steam, reaching every corner of your jar or bag. This process ensures even dense materials like whole grains are fully sterilized.
A properly sterilized substrate is like fertile soil that only your mushroom can access. Without sterilization, you're essentially hosting a microbial free-for-all. Using a pressure cooker gives your mushrooms a head start---and usually the win.
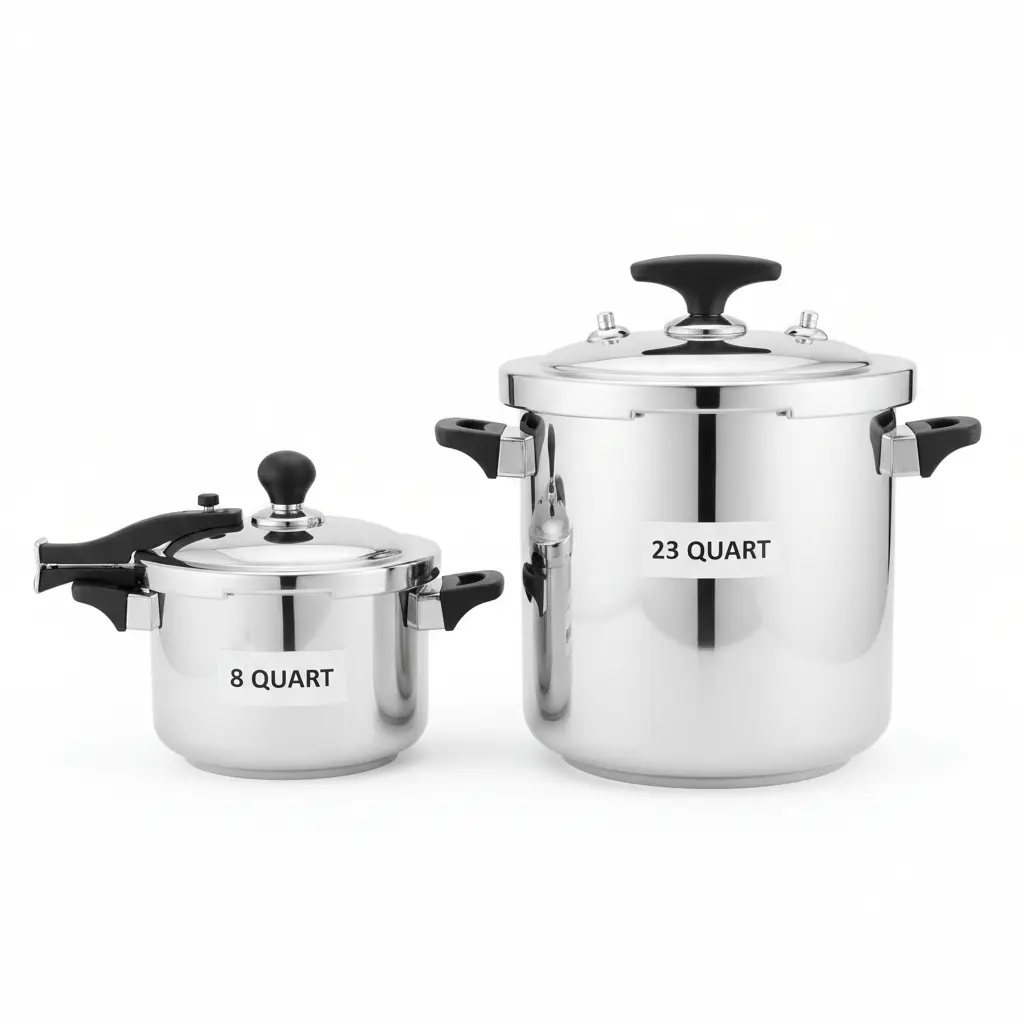
Choosing the Right Pressure Cooker for Mushroom Cultivation
Ideal Size and Capacity
Choosing the right pressure cooker depends on how much substrate you plan to sterilize per batch. For beginners, a 6--8-quart cooker is perfect for small projects or test runs. But if you're aiming for multiple jars or large grow bags, consider investing in a 23-quart pressure cooker like the Presto or All American models. These larger cookers can handle several jars simultaneously, saving you time and fuel.
Think of it this way: a bigger cooker equals fewer sterilization cycles. However, make sure your stove or heat source can handle the weight---especially when it's filled with water and jars.
Recommended Brands and Models for Sterilizing Substrate
Not all pressure cookers are built the same. For mushroom cultivation, you need one that maintains consistent pressure and has a reliable gauge.
-
All American 921 -- A cult favorite among growers. Made of cast aluminum, it doesn't rely on gaskets and can hold 7--10 quart jars at once.
-
Presto 23-Quart -- A budget-friendly yet reliable option. It has a gasket and pressure regulator that's easy to maintain.
-
T-Fal 22-Quart -- Great for home growers who want versatility between cooking and sterilizing.
Avoid smaller electric pressure cookers like Instant Pots---they rarely reach 15 PSI and won't sterilize substrate effectively.
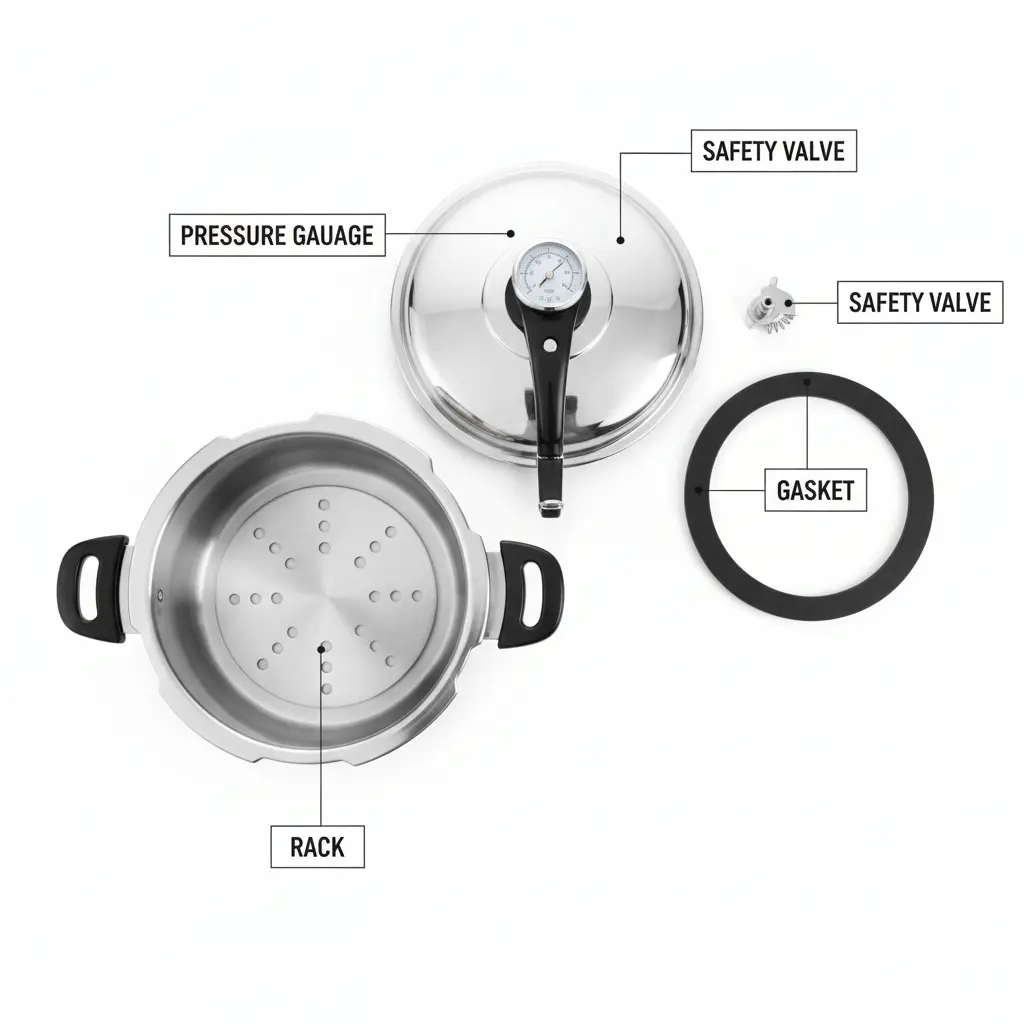
Key Features to Look For
When shopping, focus on features like:
-
15 PSI pressure rating (essential for sterilization)
-
Pressure gauge or weighted rocker to monitor pressure
-
Safety lock and release valve
-
Durable aluminum or stainless steel body
A pressure cooker is a long-term investment for mushroom cultivation. Treat it well, and it'll serve you for years---possibly decades.
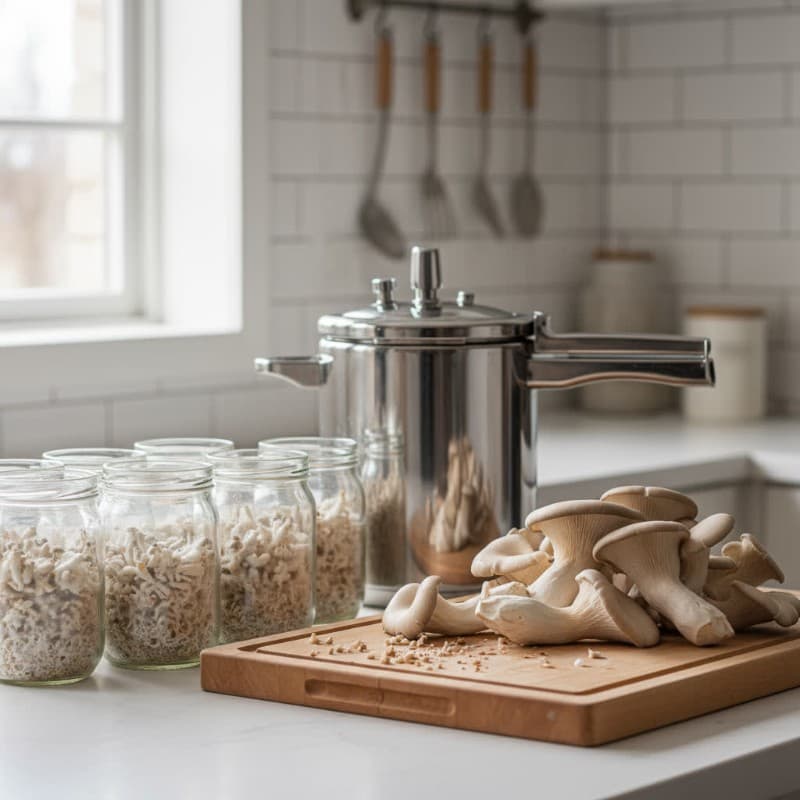
Preparing Your Mushroom Substrate for Sterilization
Common Substrate Materials (Grains, Sawdust, etc.)
Before you fire up your pressure cooker, you need to prepare your growing medium---known as the substrate. Common substrates include:
-
Grains (rye, millet, or brown rice) for spawn jars
-
Sawdust or wood chips for species like Lion's Mane
-
Straw or coffee grounds for oyster mushrooms
The goal is to provide a nutrient-rich, moisture-balanced environment for your mycelium to thrive.
Moisture Content and Mixing Ratios
Proper moisture is critical. Too dry, and the mycelium struggles to spread. Too wet, and bacteria will take over. A good rule of thumb for grains is to soak them overnight, then simmer for about 10 minutes until they're plump but not burst. Drain thoroughly and let them steam-dry for 30--60 minutes before packing.
For sawdust or straw, aim for a moisture level where a handful squeezed in your fist releases just a few drops of water. Consistency is key---the substrate should be damp, not dripping.
Packing the Substrate into Jars or Bags Properly
Once your substrate is ready, pack it into mason jars with breathable lids or autoclavable filter bags. Avoid compacting it too tightly---airflow is essential for even sterilization and later mycelium growth. Leave about an inch of headspace at the top to prevent overflow during pressure cooking.
Seal your jars or bags securely, then cover the tops with foil to prevent condensation from dripping in. Label each batch with the date and substrate type. Organization early on will save you from confusion later.
How to Use a Pressure Cooker for Sterilizing Substrate
Step-by-Step Guide to Pressure Cooking
-
Add water: Pour 2--3 inches of water into your pressure cooker. Too much water can flood your jars; too little may cause it to run dry.
-
Insert a rack: Always place a metal trivet or rack at the bottom to keep jars from direct contact with the heat.
-
Load your jars: Arrange your substrate jars or bags carefully, ensuring they're not touching the cooker's sides.
-
Seal the lid: Tighten the lid according to your model's instructions.
-
Heat and vent: Bring to a boil until steam vents steadily from the pressure valve for about 10 minutes---this pushes out air and ensures even pressure.
-
Build pressure: Close the vent and allow the cooker to reach 15 PSI.
-
Start timing: Maintain this pressure for 90--120 minutes depending on jar size.
-
Cool down: Turn off the heat and let pressure drop naturally. Never force the release.
Your substrate is now sterile and ready for inoculation once cooled completely.
Correct PSI and Time Settings for Different Substrates
Every substrate type requires a specific sterilization time and pressure to ensure all contaminants are eliminated. The gold standard is 15 PSI (pounds per square inch) --- this pressure allows the temperature inside the cooker to reach around 121°C (250°F), which is the sweet spot for killing bacterial endospores and mold contaminants.
Here's a quick guide:

Make sure you start timing only once the cooker reaches 15 PSI. Many beginners make the mistake of setting their timer as soon as they turn on the heat --- that's a guaranteed way to under-sterilize your substrate. If your cooker's pressure drops below 15 PSI during the cycle, bring it back up and add extra time to compensate.
Once the cycle is complete, allow your pressure cooker to cool naturally. Never quick-release steam --- rapid pressure changes can cause your jars to crack or bags to burst. Patience here pays off.
Cooling and Handling After Sterilization
When your cooker has cooled and the pressure indicator drops, carefully remove the lid facing away from you --- the steam inside is still extremely hot. Let your jars or bags rest inside the cooker for another 30--60 minutes before handling them. This gradual cooling helps prevent condensation buildup inside the containers.
Always handle sterilized substrate with clean hands or gloves. Wipe down the jars with isopropyl alcohol before moving them into your inoculation area. At this stage, the substrate is completely sterile --- even a single dust particle or breath can reintroduce contaminants. It's best to transfer the cooled jars or bags straight into a clean tote or closed container until you're ready to inoculate.
Remember, sterilized substrate is like a blank petri dish --- it's waiting for one organism to take over. If that organism isn't your mushroom mycelium, you've wasted hours of work. Treat it like gold.
How to Use a Pressure Cooker for Sterilizing Substrate
Step-by-Step Guide to Pressure Cooking
1. Add water: Pour 2--3 inches of water into your pressure cooker. Too much water can flood your jars; too little may cause it to run dry.
2. Insert a rack: Always place a metal trivet or rack at the bottom to keep jars from direct contact with the heat.
3. Load your jars: Arrange your substrate jars or bags carefully, ensuring they're not touching the cooker's sides.
4. Seal the lid: Tighten the lid according to your model's instructions.
5. Heat and vent: Bring to a boil until steam vents steadily from the pressure valve for about 10 minutes---this pushes out air and ensures even pressure.
6. Build pressure: Close the vent and allow the cooker to reach 15 PSI.
7. Start timing: Maintain this pressure for 90--120 minutes depending on jar size.
8. Cool down: Turn off the heat and let pressure drop naturally. Never force the release.
Your substrate is now sterile and ready for inoculation once cooled completely.
Cleaning and Maintaining Your Pressure Cooker
A pressure cooker is one of the most valuable tools in your mushroom-growing arsenal. However, like any piece of precision equipment, it needs regular care to stay safe and effective. Neglecting basic maintenance can lead to problems such as uneven pressure, gasket failure, or even dangerous steam leaks.
Post-Sterilization Cleaning Steps
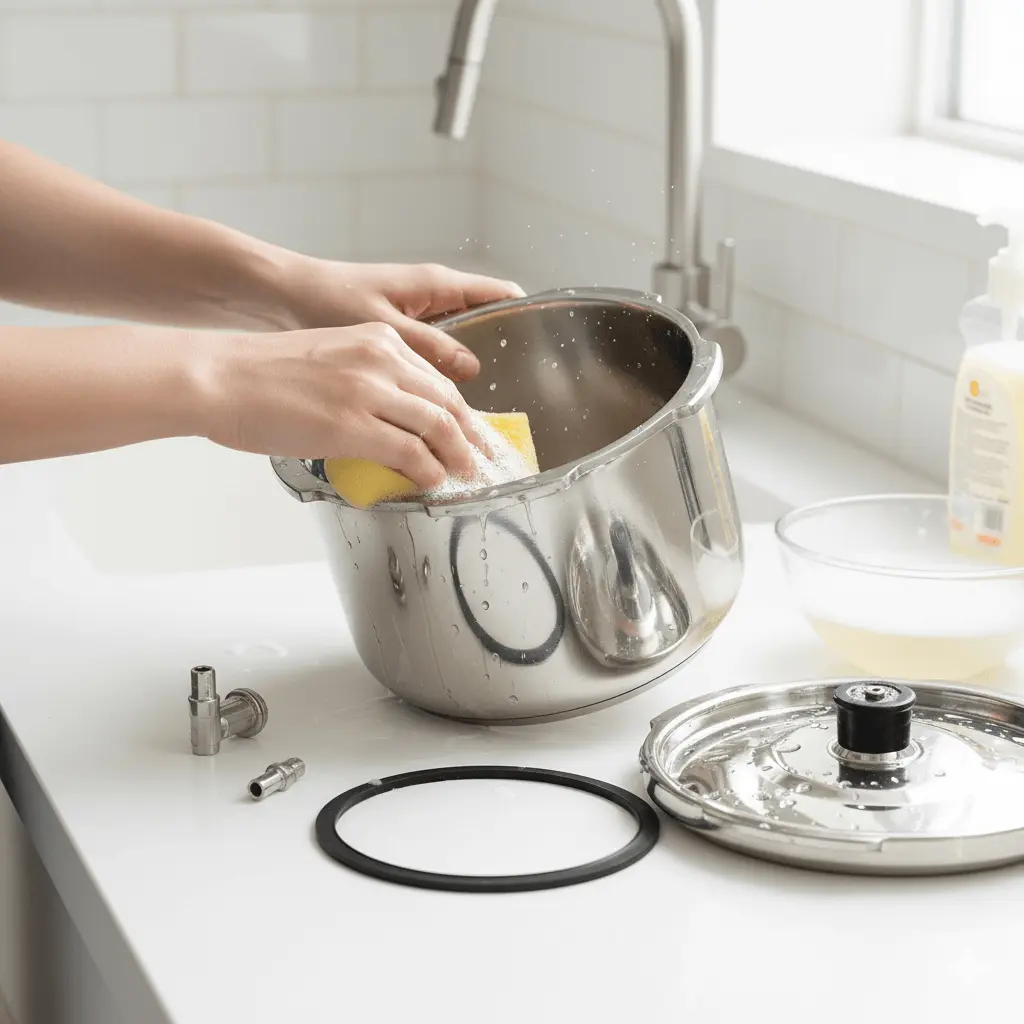
After each sterilization session, allow the pressure cooker to cool completely before cleaning. Remove any racks, weights, and the lid gasket. Wash these parts with warm, soapy water to remove mineral residue or substrate particles. Wipe down the inside of the pot with a soft sponge --- avoid abrasive pads that could scratch the metal.
Over time, minerals from hard water may form a chalky buildup inside the cooker. To remove it, fill the pot with equal parts white vinegar and water, then bring it to a gentle boil for 10--15 minutes. Rinse thoroughly afterward. This not only cleans but also helps prevent corrosion.
If your cooker has a pressure gauge, check it periodically for accuracy. Some models, like the All American series, can be sent for calibration to ensure they maintain the correct PSI.
Extending the Life of Your Pressure Cooker
To get years of reliable service from your cooker, follow these essential maintenance tips:
-
Lubricate the gasket -- Apply a thin layer of vegetable oil to the rubber gasket every few uses to keep it pliable and prevent cracking.
-
Store with the lid off -- Never clamp the lid tightly during storage. Keeping it sealed compresses the gasket and shortens its lifespan.
-
Inspect safety valves regularly -- Before each use, make sure the vent pipe and pressure release valve are clear of obstructions. You can use a toothpick or pipe cleaner to clear debris.
-
Avoid overfilling -- Always leave at least 2--3 inches of space for steam expansion. Overfilling causes pressure fluctuations and can damage both your jars and cooker.
-
Replace worn-out parts -- If you notice any cracks, stiff gaskets, or damaged valves, replace them immediately. Many brands sell inexpensive replacement kits online.
A well-maintained pressure cooker should last decades. Some All American models from the 1950s are still going strong --- proof that proper care pays off.
Safety Tips When Using a Pressure Cooker
Working with a pressure cooker involves heat and high pressure --- which means safety should always come first. While modern cookers are designed with multiple fail-safes, improper use can still cause accidents. Follow these best practices to ensure a safe and efficient sterilization process.
Avoiding Overpressure Accidents
Overpressure happens when the steam inside the cooker builds beyond safe levels, usually due to a blocked vent pipe or overfilled pot. To avoid this:
-
Before each session, check the vent and weight valve for clogs.
-
Never exceed the maximum fill line.
-
If your cooker starts venting steam erratically or shaking violently, turn off the heat immediately and let it cool naturally.
Always keep an eye on your pressure gauge. Once it reaches 15 PSI, lower the heat slightly to maintain consistent pressure. Letting it spike above 17 PSI repeatedly stresses the metal and shortens the cooker's lifespan.
Safe Opening and Handling Practices
One of the most dangerous mistakes new growers make is trying to open the cooker before it's depressurized. Steam under pressure is invisible and can cause severe burns in seconds.
Here's the safe method:
-
Turn off the stove and let the cooker cool for at least 30--45 minutes.
-
Wait until the pressure indicator drops or there's no hissing sound.
-
Gently tilt the lid away from your face to release any remaining steam.
Never use cold water or ice to speed up cooling --- this creates sudden pressure differentials that may warp the metal or crack glass jars. Patience is key to safety.
Also, avoid handling hot jars immediately after removal. Allow them to rest inside the cooker or on a heat-resistant surface until they reach room temperature. Rushing this step can lead to jar breakage and contamination.
Common Questions and Troubleshooting for Pressure Cooking Substrate
Even with experience, pressure cooker issues can arise --- from wet substrates to inconsistent sterilization. Let's look at common problems and how to fix them effectively.
1. Why Is My Substrate Still Wet After Pressure Cooking?
If you notice pooled water inside your jars or soggy grain, it usually means:
-
The substrate was too wet before sterilization.
-
You overfilled the cooker with water.
-
The heat was too high, causing excessive boiling.
Solution: Adjust your substrate's moisture content before loading --- it should feel damp, not dripping. Add just 2--3 inches of water to the cooker and use a rack to elevate your jars. Keep the heat steady once pressure is reached.
2. My Jars Didn't Sterilize Even After 90 Minutes --- What Happened?
Possible reasons:
-
The pressure never actually reached 15 PSI (some stoves fluctuate).
-
Your pressure gauge is inaccurate or clogged.
-
You started timing too early, before full pressure was achieved.
Fix: Always wait until the cooker is steadily rocking or the gauge reads a stable 15 PSI before starting your timer. If your pressure seems inconsistent, have the gauge calibrated or replace the weight valve.
3. My Cooker Ran Dry --- What Should I Do?
Running dry is one of the worst mistakes since it can damage your cooker or cause the jars to crack. If it happens:
-
Turn off the heat immediately.
-
Let the cooker cool naturally.
-
Inspect the bottom for discoloration or warping.
To prevent it, always double-check your water level before starting --- at least 2 inches deep, or enough to last through your chosen sterilization time.
4. How Do I Stop Water from Getting Into My Jars?
Condensation dripping into jars happens when steam condenses under the foil lids. To fix this:
-
Cover jar lids tightly with heavy-duty aluminum foil.
-
Avoid overfilling jars --- leave 1 inch of headspace.
-
Allow the cooker to cool slowly, so pressure drops evenly.
5. Can I Stack Jars Inside My Pressure Cooker?
Yes --- if your cooker's manual allows it. Use a metal spacer or extra rack between layers to ensure even steam circulation. Stacking saves time but only works if the cooker maintains uniform heat distribution.
Advantages of Using a Pressure Cooker Over Other Methods
Some beginners try to skip pressure cooking, thinking boiling or pasteurization is "good enough." While pasteurization works for certain bulk substrates like straw, it's not suitable for grain or sawdust substrates --- the very foundation of most mushroom grows.
Here's why a pressure cooker reigns supreme:
1. True Sterilization Power
Boiling water only reaches 100°C (212°F), but many bacterial spores survive those temperatures. A pressure cooker reaches 121°C (250°F), effectively sterilizing even dense grain jars. This is the difference between a successful grow and a contaminated mess.
2. Faster, More Reliable Results
Compared to steaming for hours, pressure cooking cuts the sterilization time nearly in half. It also gives consistent results --- you know that each batch has been heated evenly to the correct temperature.
3. Cost-Effective Long Term
A good pressure cooker might seem expensive upfront, but it pays for itself quickly. You'll waste fewer jars, lose fewer grows, and avoid having to restart batches. Plus, it doubles as a kitchen tool for canning and food preservation.
4. Versatility for Any Grower
From sterilizing agar plates and grain jars to bulk substrate bags, the pressure cooker handles it all. Once you understand timing and pressure, you can scale up production easily without needing specialized equipment.
5. Safer and More Environmentally Friendly
Unlike chemical sterilization methods (using bleach or peroxide), pressure cooking is non-toxic and eco-friendly. It uses only water and heat --- no fumes, no waste, no harmful residues.
For small-scale or home mushroom growers, the pressure cooker is the most efficient and reliable sterilization method available.
Final Thoughts on Using a Pressure Cooker for Mushroom Cultivation
Using a pressure cooker isn't just a step in mushroom cultivation --- it's the foundation of the entire process. Sterilization determines whether your project thrives or fails. By learning to operate and maintain your pressure cooker correctly, you're ensuring that your mycelium gets a clean, uncontaminated environment to flourish.
It might seem intimidating at first, but once you've run a few successful sterilization cycles, it becomes second nature. Treat your pressure cooker with respect, keep it clean, and always prioritize safety. Whether you're growing Lion's Mane, Oyster, Shiitake, or Reishi, the success of your entire grow starts right here --- with that hissing pot of steam.

Conclusion
A pressure cooker is more than a kitchen appliance --- it's the lifeline of every serious mushroom grower. It ensures sterile, contamination-free conditions, giving your fungi the best possible start. By choosing the right model, maintaining it well, and following correct pressure and timing procedures, you can master the art of sterilization and set yourself up for consistent, high-yield harvests.
So the next time you hear that steady rocking sound at 15 PSI, know this: you're not just sterilizing grain --- you're creating the perfect foundation for a thriving mushroom ecosystem.
FAQs
1. Can I use an Instant Pot for mushroom substrate sterilization?
No. Most Instant Pots only reach around 11 PSI, which isn't enough to achieve full sterilization. They can be used for pasteurization but not for sterilizing grain or sawdust substrates.
2. How often should I replace my pressure cooker gasket?
Usually every 12--18 months, depending on usage. If it becomes stiff, cracked, or leaks steam, replace it immediately.
3. Can I pressure cook plastic grow bags safely?
Yes, but only use autoclavable filter patch bags. Regular plastic bags will melt or burst under pressure.
4. Is it necessary to use distilled water in my pressure cooker?
Not mandatory, but it helps prevent mineral buildup inside the pot, especially in areas with hard water.
5. What's the most common beginner mistake with pressure cookers?
Starting the timer before reaching 15 PSI or releasing pressure too quickly after sterilization. Both can lead to contamination or broken jars.